# Ledger, budgets, and To Confirm
> The Mili Pro ledger: record every expense and income, set monthly budgets, and log due subscription charges and paychecks from To Confirm in one click.
https://miliapp.app/en/guide/ledger/
> [!PRO]
> The ledger, budgets, To Confirm, and Cash Flow are part of Mili Pro.
## Add an entry
Choose File > Add Entry… (⌥⌘N), or click Add Entry in Transactions:
- Choose Expense or Income, then enter the amount and currency.
- Choose a category. There are 15 expense categories, such as Food & Dining, Groceries, Transportation, and Housing, and 6 income categories, such as Salary, Bonus, and Side Income.
- Fill in the date, Payment Method (called Deposit Method for income), Merchant / Description, and Notes. Merchant names autocomplete based on entries you’ve added before.
To add several entries in a row, use Save and Continue (⇧⌘S).
## Transactions
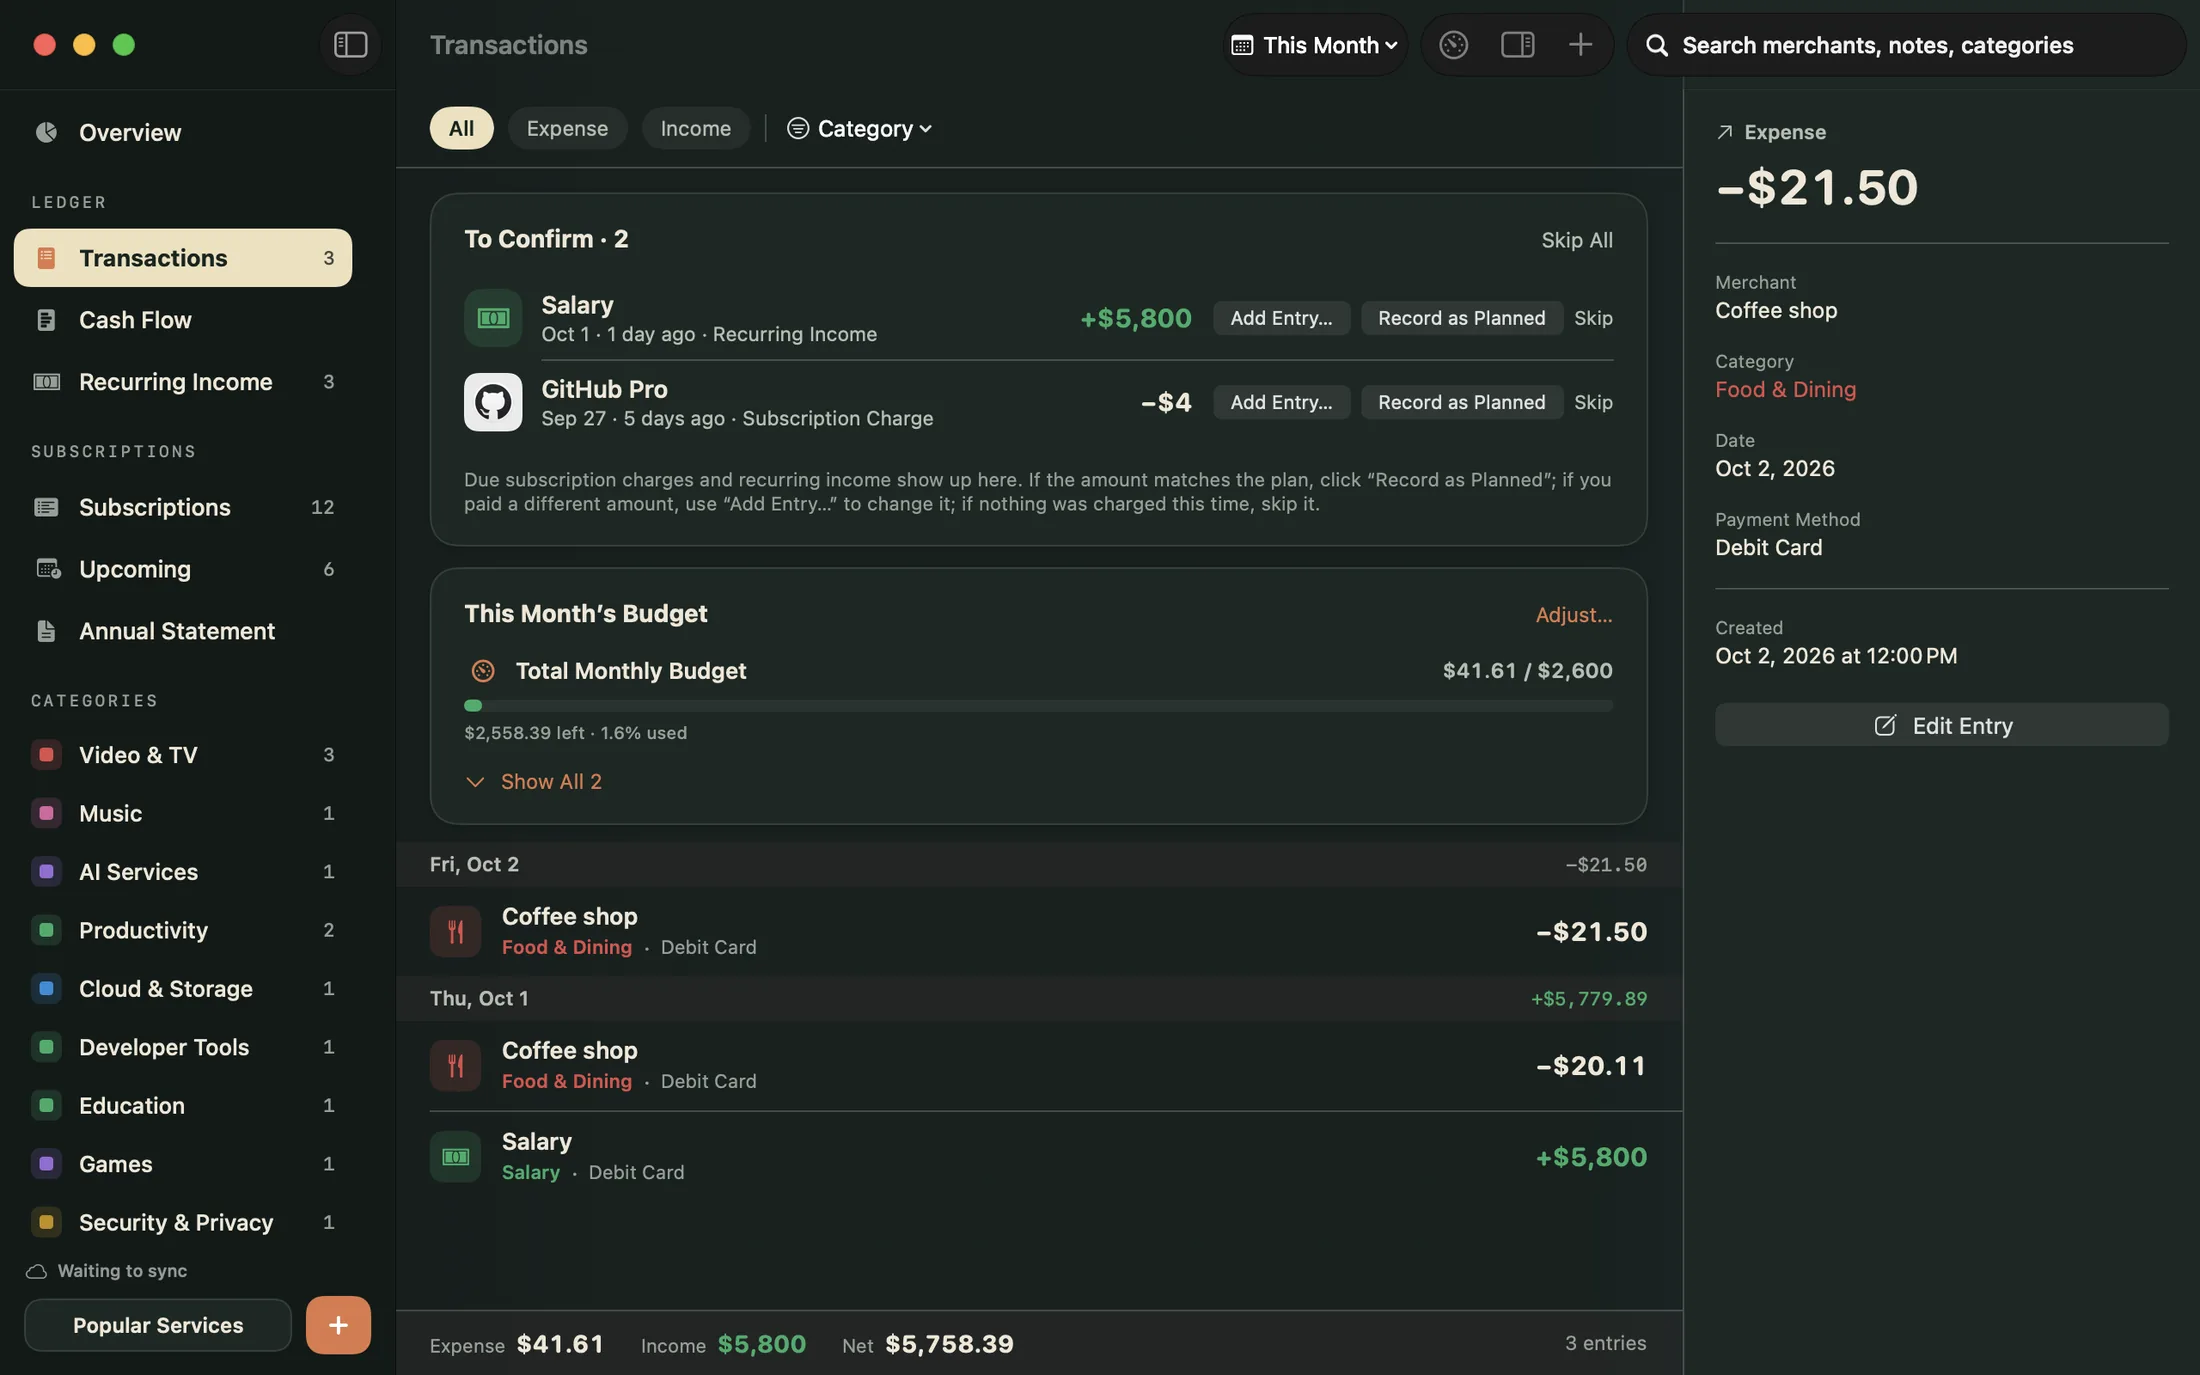
Transactions (⌘2) lists every entry, grouped by date:
- Choose a time range — This Month, Last Month, This Year, Last 90 Days, or All — and show only expenses, only income, or a single category.
- Search by merchant, notes, or category.
- Double-click an entry to edit it, or Control-click it to choose Duplicate as New Entry or delete it. Hold down ⌘ and click to select several entries, then change their category or delete them all at once.
- Deleted something by mistake? Click Undo or press ⌘Z.
- The bottom of the list shows the expenses, income, net, and number of entries for the period.
## Monthly budgets
Click Budget in the Transactions toolbar to set a Total Monthly Budget. You can also set a budget for each expense category; leave it blank for no limit.
Budgets run by calendar month and count only the expenses you’ve recorded. The progress bar shows how much is left and what percentage you’ve used: it turns yellow at 85% and switches to a bold warning color once you go over. You can see your budget in both Overview and Transactions.
## To Confirm: from planned to actual
Subscription charges and recurring income that come due appear in To Confirm. There are three ways to handle each item:
- **Record as Planned**: Records an entry for the planned amount. Subscription charges are recorded under the Subscriptions category.
- **Add Entry…**: Opens an editor that’s already filled in, so you can change it to the actual amount before saving — for example, if the exchange rate was different this time or you were charged a little more.
- **Skip**: If nothing was charged or received this time, skip it.
Click Skip All to skip every item at once. Skipped something by mistake? Just undo it in Transactions (⌘Z).
To Confirm starts from the day you begin keeping your ledger. Items you’ve recorded or skipped won’t appear again. Items you haven’t dealt with stay in the list, even after their date has passed, until you handle them.
## Cash Flow
Cash Flow (⌘6) counts only the entries you’ve actually recorded: the year’s actual spending, actual income, net, and how much of that spending went to subscriptions; monthly income and expense charts and tables; and expense and income breakdowns. Click Export CSV to export all entries for the selected year.